Final summary

Final AVI
Strengths

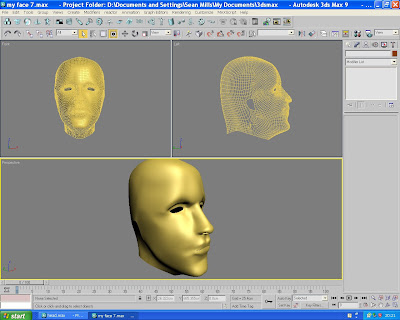
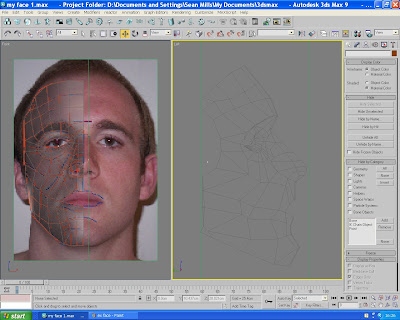
I feel one of the strengths of my model is the smoothness of my face area, I think this was because I tried to keep all geometry flowing naturally, trying to stay away from square/straight lines and edges.

Weaknesses

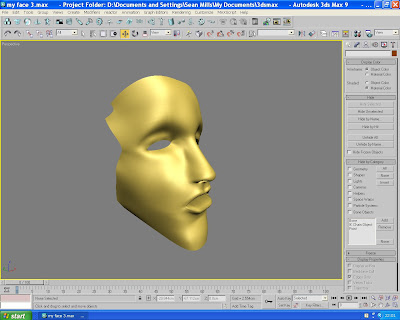
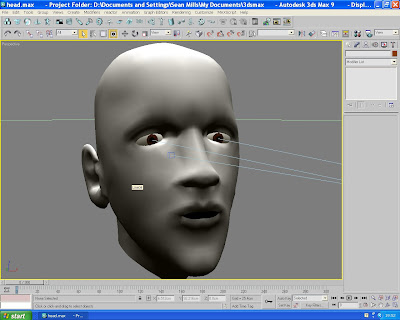
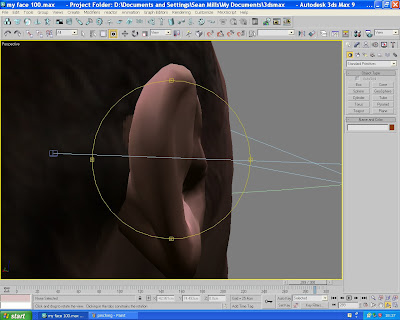
Although I am happy with what I created, there are many weaknesses. The main area which stands out to me is the modelling of my ear. I found this particularly hard and probably the most challenging part of the task. I think that by not having enough topology/detail on my ear I was unable to create a model I was happy with and instead ended up with a couple of fat ears!!!!!

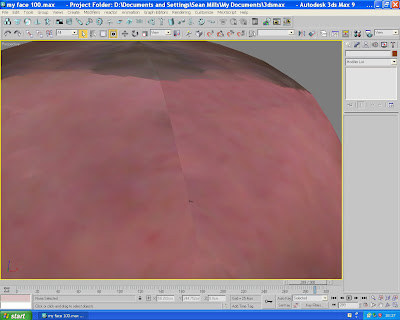
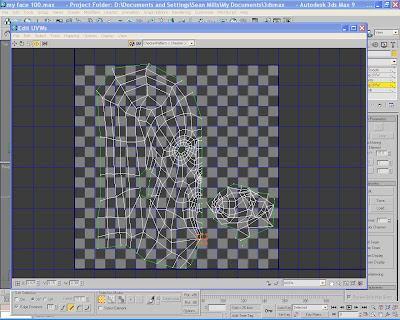
My UVW Unwrap had a slight over lap between a few vertices, this ended up creating a seam when rendered out. If I had more time this could have been simply ironed out by moving the vertices so they did not overlap, lesson learnt for next time though!!


After creating my face map i wish i had been able to keep more quality within my file, i ended up editing it too much and losing the crispness of the original images. Again, lesson learnt for next time i do this!!
All in all I have learnt a lot of new features/tools Max has to offer and I am content with what I have produced.

Rigging eyes and playing with hair modifiers!!!

I had intended to play around with morphing my face, however time was not on my side so I decided to just have a play around with hair/fur modifiers and rig my eyes!!!

* Firstly I created two spheres for my eyes

* The next stage was to create my pupils so they would move around. This was done by creating two more spheres, but this time adjusted the hemisphere to create just a pupil. The pupils were then linked to a point, so when the point moved so did the pupils.
* With the eyes rigged and a material added, I applied a fur modifier to the head and had a play around with this for several hours, good fun!!
* To finish off I created a fly for the eyes to follow and added a some sound for it, here's what i ended up with;
Summary;

This was really good fun!!! The fur modifier is easy to use and you can get some really good results form it.

Applying UVW Unwraps and creating maps!!

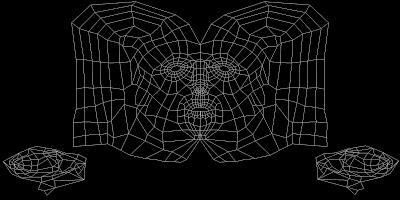
* The head is now coming together and it’s time to create the maps.

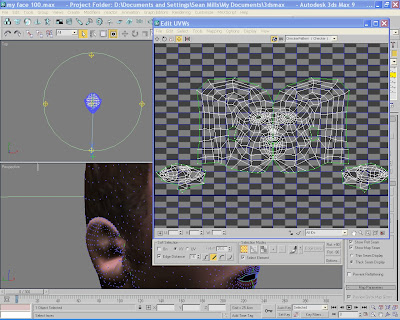
* Firstly I added a UVW Unwrap modifier to one side of my head, using the relax tool to simplify it, this enable the material assigned to it to run smoother and more constant over the head.


* Once the unwrap modifier for the whole head was complete I saved it so I was able to take it into Photoshop to be used as a guide


* From here I was able to take section of my face from my original photos, copy and past them on top of my grid/guide layer for the map and slowly build it up. I then blending each section into one another, trying to ensure their was no contrast between them.

* Several hours later I was done and ready to stick the map on my head!! Once the map was applied the head really come to life and did actually look a little like me!!!!


* After looking over the head in Max I went back and edited the map several times untill I got the result i wanted.


Creating my bump map

Summary

* I was pleased with the result I achieved here, but there were certain areas which were not up to scratch, when I welded the two unwraps together , a slight over lapping occurred on some of the vertices on my forehead. This resulted in what looks like a seam on my head, if your look closely. Also where i played around with the map to much i lost a lot of quality form my original images, if this was avoided the final map would have been of a higher quality and therefor looked more realistic. However for my first time round I was happy with how it finished up!!!


Modelling the ear

* Now the face and head were modelled I could move on to modelling the ears!!!

* I done this the same way as I created the face; by sketching in my topology on max , tracing over the bitmap which had been created in Photshop with the ear topology on.

* The next stage was to attached all the lines and convert them into a editable poly.

* Once I had one object I move the vertices around and created more edges to give the ear more depth.

* Once I was happy I then simplified the geometry on the inside face of my ear so it was easier to tie up with the geometry on my head.

* To finish off I attached the ear to the face and welded its perimeter to the face.

Summary

* I found this the most frustrating part so far, I spent hours and hours trying to get a better result but just couldn't achieve the final result I was after. I think I needed more detail on my topology and more time to tweak it!!

Creating the back of the head and attaching it to the face!!

* Before modelling the back of the head the topology had to be added to the topology bitmap in Photoshop.
* Once the topology was shown on the side plane I created a sphere, roughly the same size as the head. The sphere was positioned so the poles come out the side of the head.

* At this stage the sphere was a lot wider than the head so I scaled it down.

* Once the sphere was a similar size to the head I decreased the number of segments to suite the geometry coming up form the face.

* I then converted the sphere into a editable poly and unnecessary geometry was then deleted, leaving just from the forehead back, removing side faces and all faces to the right of the symmetry plane.

* The vertices from the top of the head were then aligned with those from the face, i used soft selection on the vertices that were far away from the one which it would be joined to, this stopped any sharp edges being created within the model.
* At this point I simplified the geometry by using ring selection and the collapse tool to remove every other vertical strip of faces on the back of the head.

* Using this as a base i created the rest of the head geometry from this. When creating it two reasonably large faces were modelled around the ear area so that the ear can be attached at a later date!

Creating my nose, lips and eyes.

* As the nasal passage/nostrils, lips and eyes were just holes in the editable poly at the moment the objective of the next stage was to create detail around these areas.

* Extra geometry was created by taking the existing edges, scaling them down and also using the connect and create tools.

* At this point there is still a hole in the centre of the nose, this was overcome by creating two faces and extruding them back into the head to create a nasal passage affect!!

* The same techniques were used to add detail to the eye and lip areas!
Summary

*I found the connect and create tools very helpful to add or edit geometry so it runs smoother! Handy if any quads were left off when sketching the topology lines.

Tweaking (many hours later)

* After adding the turbo smooth modifier is was clear that there was a lot of tweaking to be done.

*Several hours later I was happy with the result and moved onto creating the nose and lips.

Adding symmetry and turbo smooth modifiers.

* After a lot of playing around one side of my face was looking reasonable and ready to mirror!

* This was done by using a Symmetry modifier, by selecting the correct axis the editable poly
was mirrored.

* By moving the modifiers gizmo the plane of symmetry was move so the two central lines of vertices joined with no pinching or over lapping.

* I then added a turbo smooth modifier to smooth off the edges.

Extruding vertices

* The next stages was to extrude the vertices of the editable poly.

* Working from right to left I moved each vertex out. The first set come out level with the edge of the side view and the rest relative to this.

Summary

* Making sure the points flowed in natural curves was very time consuming.

* Areas with more detail (eyes and nose) were tricky to get right as there are a lot of vertices within small areas!!

Sketching topology

* The planes were finished and it was now possible to start sketching in the topology.

* Firstly I set the creation method for the lines so the initial and drag type were set to corner, this makes sure you create sharp corners to the quads.

* With the snap tool on i sketched each quad onto the front plane.

* Once all quads were drawn I converted one quad into an editable poly and all other lines were attached to this. This creates one complete surface. Now the sketch was solid all vertices were welded together so they are all linked.

* All vertices running vertically down the centre of the face were aligned using the ’make planar’ tool.

* The editable poly was then made transparent within its properties to make modelling easier.

Adding topology to planes in 3D Max;

* Now working in Max I created planes for both front and side views of the head. I roughly measured my head (very large) before hand so my planes were approximately the same size.

* Next I created a material using my head topology set as the bitmap, I then assigned the material to the two planes and made it visible in view ports.

* Using UVW map modifiers and ‘bitmap fit’ the bitmap was scaled and moved to fit the planes.

* Both planes were then frozen and not shown in grey to make life easier for the next stage.


Taking photos and Adding topology

* The first step was to take the photos and upload them.

* I then aligned the front and side views in Photoshop, making sure key areas (mouth, chin, eyes) lined up and removed any lens distortion.
Adding topology

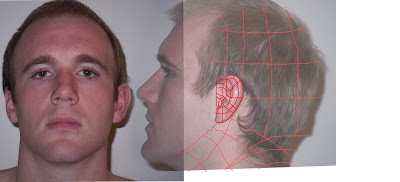
* Firstly I printed off both the front and side views of my head and sketched on the key areas, marking out the key structure of the face and any creases and wrinkles.

* This was then transferred onto Photoshop as a new layer and shown on my photos in blue.

* From this layer I was then able to divide the face up into quads as a separate layer and shown in red.


Summary

I found it easier to draw the topology on by hand first, then transfer it onto Photoshop, it made breaking the face area up into quad a little easier.


When dividing the face up into quads it was hard to try and stick to quads, but it is important as once transferred into Max anything less than a four sided poly will cause nasty surfaces!! Lesson learnt there!!!!