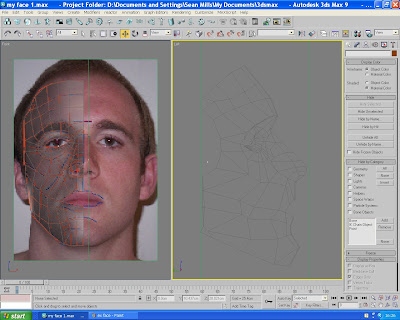
Project analysis

Virtual Environments has been a challenging module, not only because I have had to learn new skills within 3D Max, but also because I have had to work as part of team and work to more frequent deadlines over the last six week to ensure as a group we could keep on progressing. Also the fact that we were producing the work on the behalf of an organisation meant that there were stricture guidelines to our work.

On a personal level I lave learnt many new skills within Max, mainly character modelling, bipeds and skinning, adding motion to bipeds, cloth modifiers and also the ability to create a UVW unwrap to aid materials within a scene.

Working as part of a team was very different to what I have been used to, you are relying on others rather than just yourself. Fortunately for myself we all stuck to the deadlines set and produced the work set out at the beginning of the assignment. I think the message we were trying to promote was encouraged within the animation. The message being that the YMCA welcomes all people, whoever you are or whatever your interests are and that the organisation is all about bringing people together. This was found to be an issue the YMCA are trying to overcome, this is because manly people believe it is specific to one genre and therefore not appealing to everybody within the community.

When we had the meeting at the YMCA is was said that the animation should not be too serious, as our target audience would prefer a more laid back comical approach. We have to tried to achieve this by using cartoon characters and not using the faces modelled during the first six weeks. I personally tried to give my character lots of movement to project a light hearted energetic mood.
The time scale we had to work within was a lot less than I have previously been used to, which meant the work had to be produced at a much quicker rate!! If more time was available there are areas of my work I would like to improve, one of which being my map for my character, I would liked to add more detail to this. Although the character is not supposed to be life like and maintain a cartoon appearance, I would have still like to add some more detail to her clothing. Also if the animation is looked at frame by frame there are a few areas of the character where envelopes could be modified to produce a smoother animation when the character is in motion. However when time is not on your side you have to draw the line somewhere and move on to ensure the work is completed on time, unfortunately this means that the highest quality can not also be achieved within the time scale.

Generally I was pleased with the work me and the group produced and the way in which the group conducted it’s self, everybody pulled their weight and completed the tasks asks of them, we communicated well and helped each other when we needed to. I have picked up many new skills within 3D Max and Photoshop which will aid my future work. As a individual I have learnt to work within a group whilst also producing work for an organisation and trying to provide for their needs. The final piece was as we had intended and I feel it promoted the message we wanted it to, that the YMCA is about bringing people together and that everybody is welcome.

Final scene work

Working on final scene

Damien has created a building to represent the YMCA with a road, paths and streets lights. This is the base for our final scene. I added some more detail to the scene before merging my character in. I created a litter bin, bench, street sign and two more buildings for the scene. To finish it off I added a spot light shining up onto the ‘Y’ sign.


Time to add my character into the final scene.

The first step was to merge my character into the scene, this was already skinned to a biped from my bedroom scene. I added some motion to the character/biped, I have rigged the character to wave. Once the other characters are merged into the scene the plan is that it will look like she is greeting them before they go into the YMCA building, that’s the plan anyway!!!!!!!!
Once I had added motion and some footsteps I move, rotated them to suite the scene and so that the character was walking into the building after she had finished waving.
The scene just needs Martin’s and Damien’s character adding to it and it is finished!!


Merging character into scene!!!

With the room finished I merged my character file into my room scene. I then positioned the character and adjusted the footsteps to suite the room. Lighting was then added and the camera and target given some motion to get my final results, after a little tweaking here’s what I ended up with;

I am happy with the results i have achieved here and i have learned many new techniques whilst producing the scene. In particular with bipeds, skinning and adding motion to a character, these were fairly tricky to get used to, but the results which can be achieved are worth the hours spent getting used to the tools!!

Creating the bed sheet;

I decided to put a bed sheet on the bed and to get a good result I used a cloth modifier on a box. When creating the box (sheet) I made sure it had plenty of segments, this will allow for a more realistic result. With the mattress set of the collision object and my recently created box as the cloth object, the modifier was then simulated. This gives a animation of the cloth falling on the bed, this is not what I wanted in my animation, all i need was a still object. So this didn’t happen I converted the object into a editable poly so it remained in a cloth like state through out, with no animation.

Filling the room

Now I had the beginnings of a room, I had to fill it up with objects which would be in the interest of a teenage girl!! I went down the route of girl band posters, CD’s, pop magazines, and generally having everything pink to try and project that my character is actually a female, beside the manly swagger!!
I tried to fill the room up so it doesn't look bare. This was hard as I need a fairly large room for my character, because when animated she takes up a fare amount of floor space!! Here’s what I produced anyway:

Time to start working on the characters bedroom!!!

Now the character is finished I had to start working on my room. I started off by creating walls (one with a window), ceiling, floor and curtains. This will be by base for the scene;


Creating poster for scene

I created the following poster in photoshop, I'm planning on focusing on it for the last few frames of the scene. I picked up some info from the YMCA website and was able to come up with this;

Finishing character model, adding motion and creating maps

* The following stages involved me adding geometry to my body, hands, feet and a head were modelled to complete my character

* Once this was rigged to a biped I added motion to my character.

Creating a Map

* The next stage was to create a map for my character, this was achieved by adding a UVW Unwrap. The vertex for the hands, top, legs and feet were separated so I could give the affect of different clothing. This was done is the same way as the face and ear were seperated when creating the maps for the face task. The map was then taken into photoshop and used as a base layer so my final bitmap could be created.


Creating and rigging body with motion

* By creating a cylinder, converting it into a editable poly and moving/scaling, adding geometry, along with symmetry and turbo smooth modifiers I was able to achieve this. I still need to add my, head, hands and feet before passing it onto Damien and Martin but you can get the idea!!


* After this I created a biped and added a skin modifier to rig the body to it!

* By adding a motion to the biped I was able to give the affect of my character shown in the AVI.

Final summary

Final AVI
Strengths

I feel one of the strengths of my model is the smoothness of my face area, I think this was because I tried to keep all geometry flowing naturally, trying to stay away from square/straight lines and edges.


Weaknesses

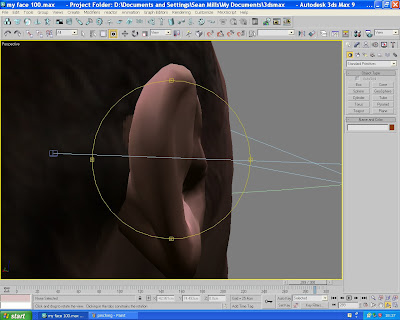
Although I am happy with what I created, there are many weaknesses. The main area which stands out to me is the modelling of my ear. I found this particularly hard and probably the most challenging part of the task. I think that by not having enough topology/detail on my ear I was unable to create a model I was happy with and instead ended up with a couple of fat ears!!!!!


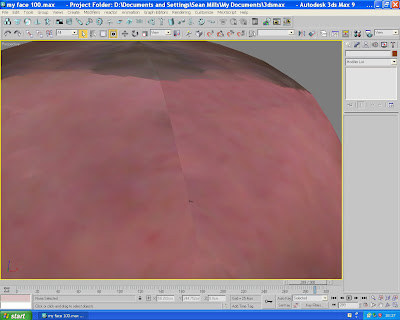
My UVW Unwrap had a slight over lap between a few vertices, this ended up creating a seam when rendered out. If I had more time this could have been simply ironed out by moving the vertices so they did not overlap, lesson learnt for next time though!!


After creating my face map i wish i had been able to keep more quality within my file, i ended up editing it too much and losing the crispness of the original images. Again, lesson learnt for next time i do this!!
All in all I have learnt a lot of new features/tools Max has to offer and I am content with what I have produced.

Rigging eyes and playing with hair modifiers!!!

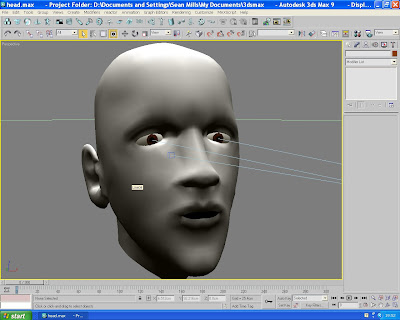
I had intended to play around with morphing my face, however time was not on my side so I decided to just have a play around with hair/fur modifiers and rig my eyes!!!

* Firstly I created two spheres for my eyes

* The next stage was to create my pupils so they would move around. This was done by creating two more spheres, but this time adjusted the hemisphere to create just a pupil. The pupils were then linked to a point, so when the point moved so did the pupils.
* With the eyes rigged and a material added, I applied a fur modifier to the head and had a play around with this for several hours, good fun!!
* To finish off I created a fly for the eyes to follow and added a some sound for it, here's what i ended up with;
Summary;

This was really good fun!!! The fur modifier is easy to use and you can get some really good results form it.

Applying UVW Unwraps and creating maps!!

* The head is now coming together and it’s time to create the maps.

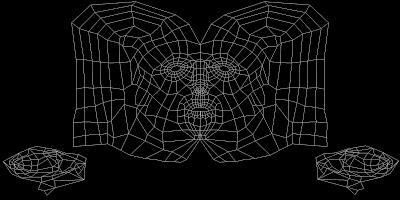
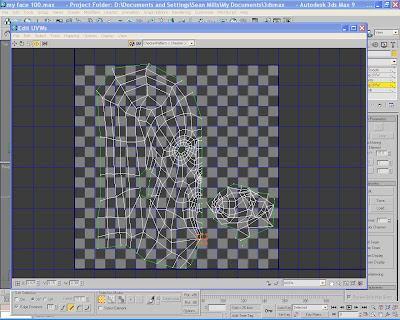
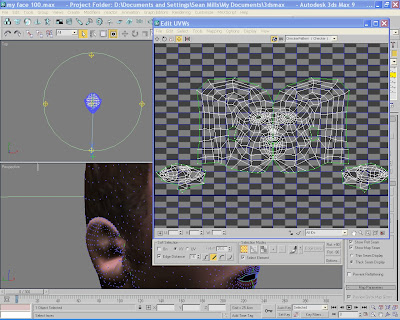
* Firstly I added a UVW Unwrap modifier to one side of my head, using the relax tool to simplify it, this enable the material assigned to it to run smoother and more constant over the head.


* Once the unwrap modifier for the whole head was complete I saved it so I was able to take it into Photoshop to be used as a guide


* From here I was able to take section of my face from my original photos, copy and past them on top of my grid/guide layer for the map and slowly build it up. I then blending each section into one another, trying to ensure their was no contrast between them.

* Several hours later I was done and ready to stick the map on my head!! Once the map was applied the head really come to life and did actually look a little like me!!!!


* After looking over the head in Max I went back and edited the map several times untill I got the result i wanted.


Creating my bump map

Summary

* I was pleased with the result I achieved here, but there were certain areas which were not up to scratch, when I welded the two unwraps together , a slight over lapping occurred on some of the vertices on my forehead. This resulted in what looks like a seam on my head, if your look closely. Also where i played around with the map to much i lost a lot of quality form my original images, if this was avoided the final map would have been of a higher quality and therefor looked more realistic. However for my first time round I was happy with how it finished up!!!


Modelling the ear

* Now the face and head were modelled I could move on to modelling the ears!!!

* I done this the same way as I created the face; by sketching in my topology on max , tracing over the bitmap which had been created in Photshop with the ear topology on.

* The next stage was to attached all the lines and convert them into a editable poly.

* Once I had one object I move the vertices around and created more edges to give the ear more depth.

* Once I was happy I then simplified the geometry on the inside face of my ear so it was easier to tie up with the geometry on my head.

* To finish off I attached the ear to the face and welded its perimeter to the face.

Summary

* I found this the most frustrating part so far, I spent hours and hours trying to get a better result but just couldn't achieve the final result I was after. I think I needed more detail on my topology and more time to tweak it!!

Creating the back of the head and attaching it to the face!!

* Before modelling the back of the head the topology had to be added to the topology bitmap in Photoshop.
* Once the topology was shown on the side plane I created a sphere, roughly the same size as the head. The sphere was positioned so the poles come out the side of the head.

* At this stage the sphere was a lot wider than the head so I scaled it down.

* Once the sphere was a similar size to the head I decreased the number of segments to suite the geometry coming up form the face.

* I then converted the sphere into a editable poly and unnecessary geometry was then deleted, leaving just from the forehead back, removing side faces and all faces to the right of the symmetry plane.

* The vertices from the top of the head were then aligned with those from the face, i used soft selection on the vertices that were far away from the one which it would be joined to, this stopped any sharp edges being created within the model.
* At this point I simplified the geometry by using ring selection and the collapse tool to remove every other vertical strip of faces on the back of the head.

* Using this as a base i created the rest of the head geometry from this. When creating it two reasonably large faces were modelled around the ear area so that the ear can be attached at a later date!

Creating my nose, lips and eyes.

* As the nasal passage/nostrils, lips and eyes were just holes in the editable poly at the moment the objective of the next stage was to create detail around these areas.

* Extra geometry was created by taking the existing edges, scaling them down and also using the connect and create tools.

* At this point there is still a hole in the centre of the nose, this was overcome by creating two faces and extruding them back into the head to create a nasal passage affect!!

* The same techniques were used to add detail to the eye and lip areas!
Summary

*I found the connect and create tools very helpful to add or edit geometry so it runs smoother! Handy if any quads were left off when sketching the topology lines.

Tweaking (many hours later)

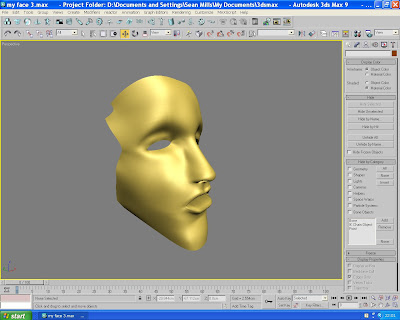
* After adding the turbo smooth modifier is was clear that there was a lot of tweaking to be done.

*Several hours later I was happy with the result and moved onto creating the nose and lips.

Adding symmetry and turbo smooth modifiers.

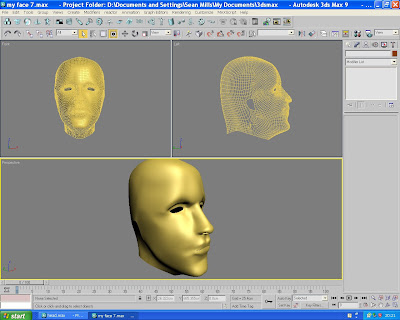
* After a lot of playing around one side of my face was looking reasonable and ready to mirror!

* This was done by using a Symmetry modifier, by selecting the correct axis the editable poly
was mirrored.

* By moving the modifiers gizmo the plane of symmetry was move so the two central lines of vertices joined with no pinching or over lapping.

* I then added a turbo smooth modifier to smooth off the edges.

Extruding vertices

* The next stages was to extrude the vertices of the editable poly.

* Working from right to left I moved each vertex out. The first set come out level with the edge of the side view and the rest relative to this.

Summary

* Making sure the points flowed in natural curves was very time consuming.

* Areas with more detail (eyes and nose) were tricky to get right as there are a lot of vertices within small areas!!

Sketching topology

* The planes were finished and it was now possible to start sketching in the topology.

* Firstly I set the creation method for the lines so the initial and drag type were set to corner, this makes sure you create sharp corners to the quads.

* With the snap tool on i sketched each quad onto the front plane.

* Once all quads were drawn I converted one quad into an editable poly and all other lines were attached to this. This creates one complete surface. Now the sketch was solid all vertices were welded together so they are all linked.

* All vertices running vertically down the centre of the face were aligned using the ’make planar’ tool.

* The editable poly was then made transparent within its properties to make modelling easier.

Adding topology to planes in 3D Max;

* Now working in Max I created planes for both front and side views of the head. I roughly measured my head (very large) before hand so my planes were approximately the same size.

* Next I created a material using my head topology set as the bitmap, I then assigned the material to the two planes and made it visible in view ports.

* Using UVW map modifiers and ‘bitmap fit’ the bitmap was scaled and moved to fit the planes.

* Both planes were then frozen and not shown in grey to make life easier for the next stage.


Taking photos and Adding topology

* The first step was to take the photos and upload them.

* I then aligned the front and side views in Photoshop, making sure key areas (mouth, chin, eyes) lined up and removed any lens distortion.
Adding topology

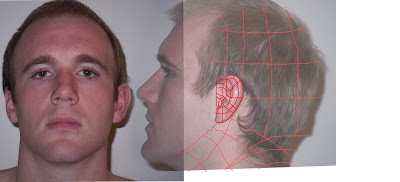
* Firstly I printed off both the front and side views of my head and sketched on the key areas, marking out the key structure of the face and any creases and wrinkles.

* This was then transferred onto Photoshop as a new layer and shown on my photos in blue.

* From this layer I was then able to divide the face up into quads as a separate layer and shown in red.


Summary

I found it easier to draw the topology on by hand first, then transfer it onto Photoshop, it made breaking the face area up into quad a little easier.


When dividing the face up into quads it was hard to try and stick to quads, but it is important as once transferred into Max anything less than a four sided poly will cause nasty surfaces!! Lesson learnt there!!!!

First Impressions

After last years GS2 module my first thoughts on the brief are that it’s certainly going to be a challenge and secondly there are going to be lots of late nights!!!! But on the positive side, it will be good fun and I am looking forward to getting stuck into Max again.

Modelling my own face sounds like fun, I have used a similar method before but the model was not as complicated, so I am expecting many hurdles before it has been finished.

Working for the YMCA will make a difficult, but nice change. I am a little unsure what they actually do at the moment, so I am hoping this will become a lot clearer after the visit next week and some research before hand.